Enabling Talos OS SecureBoot on HP EliteDesk 800 G5
Posted February 15, 2025
Last updated February 16, 2025 | 0f86be3
6 minute read
Table of Contents
I’ve recently purchased a few HP EliteDesk 800 G5 desktops for my new homelab v2. This is to supplement my existing UnRAID setup with things running in containers, and some cronjobs on my main desktop that I sometimes have powered off. I’ll hopefully write some more about the whole new setup later, but for now, I just want to focus on getting my compute set up (securely) with Talos OS on my new nodes.
The problem 🔗
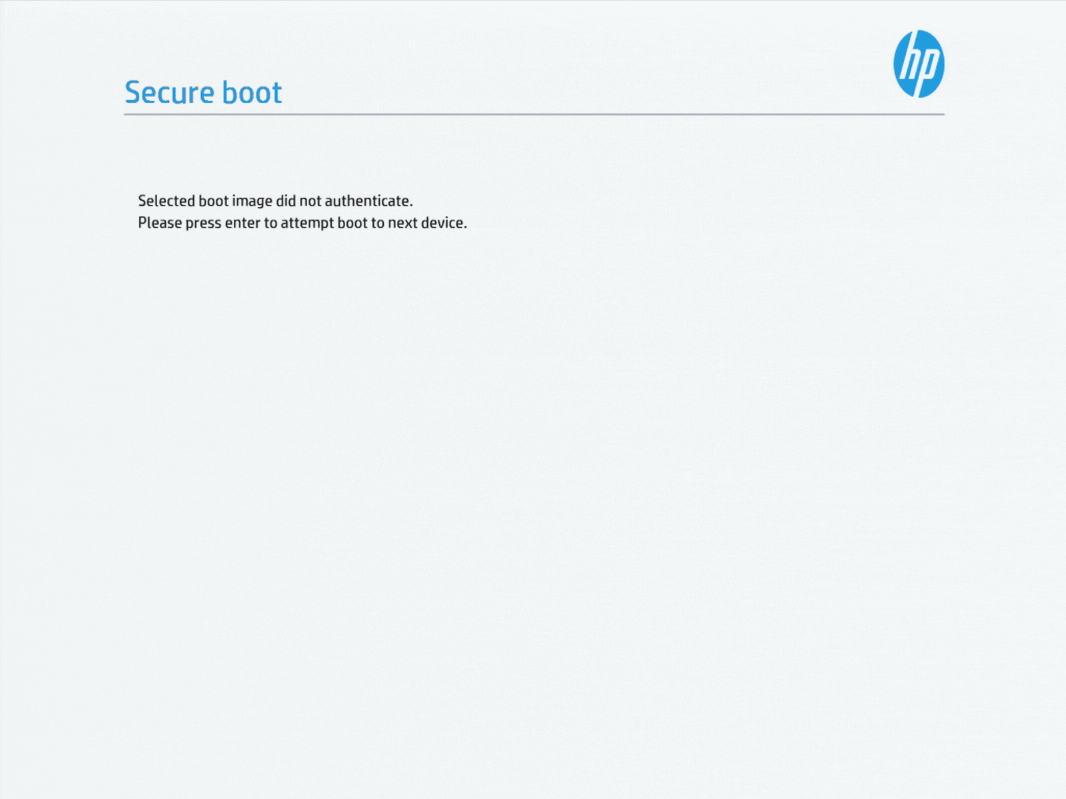
By default, the HP EliteDesk 800 G5s wouldn’t boot from the SecureBoot version of Talos OS from the image factory that I’ve burned to a flash drive. It would only give an error message of “Selected boot image did not authenticate”:
Why? 🔗
HP’s UEFI on the EliteDesk 800 G5s doesn’t support the SecureBoot certificate used by the boot image from Sidero Labs right out of the box. The certificate used by the Image Factory Talos OS ISO isn’t part of the default trust chain, so SecureBoot fails (by design). This is actually a feature and not a bug, as SecureBoot is designed to prevent malicious software from changing anything in the boot process.
To quote Microsoft (who plays a significant role in the SecureBoot ecosystem):
To prevent malware from abusing these options, the user must manually configure the UEFI firmware to trust a non-certified bootloader or to turn off Secure Boot. 1
The solution 🔗
We need to modify our UEFI to trust the Sidero Labs certificate. Luckily, Sidero Labs has some excellent and comprehensive documentation on this process2. While it doesn’t have exact instructions for the HP EliteDesk UEFI, it does have a general guide for adding a new certificate to the UEFI trust chain. And with enough poking around, we can make this work!
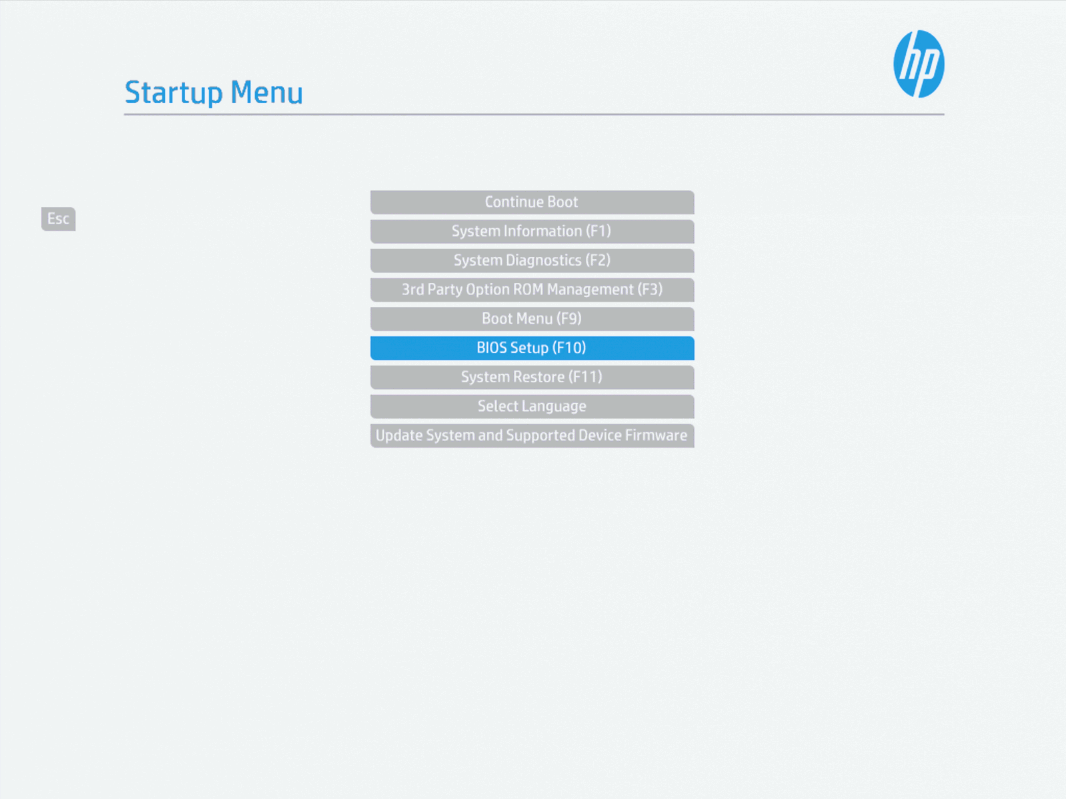
We can restart our machine, and start spamming the escape key to get into the BIOS setup.
Disable Secure Boot Keys Protection 🔗
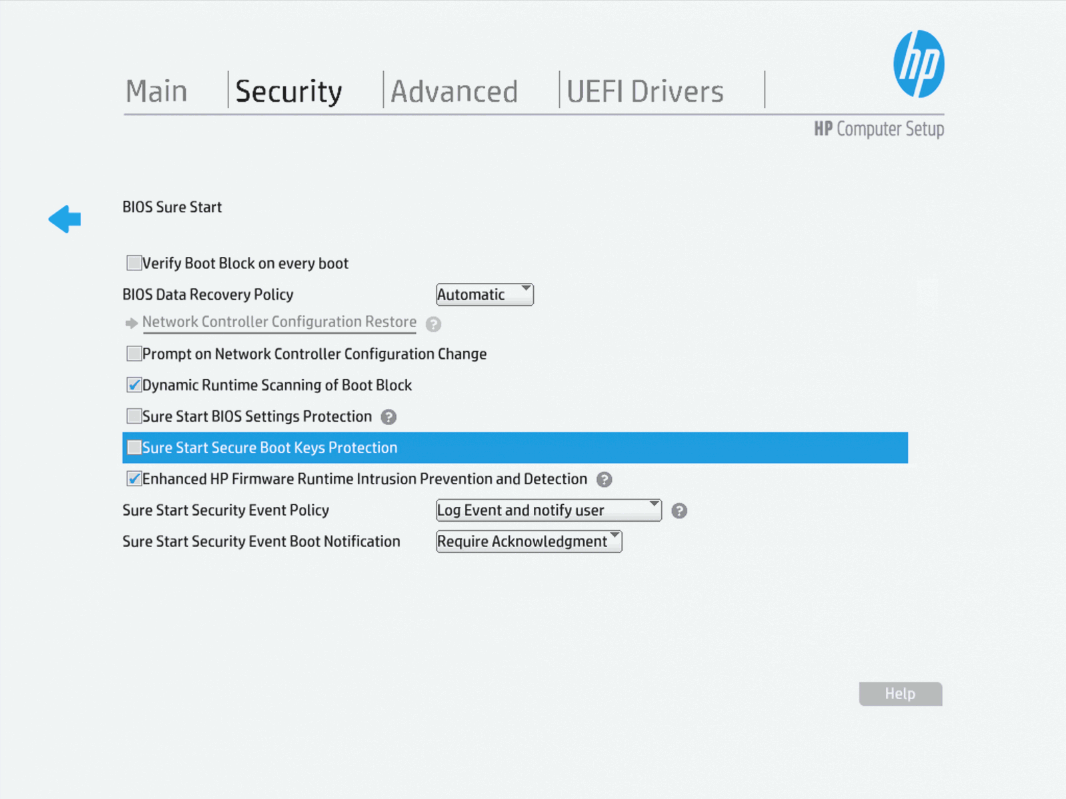
Once we’re in the BIOS setup screen, we should navigate to the Security tab at the top, and the select the “BIOS Sure Start” option. Once we’re in the BIOS Sure Start screen, we can uncheck the “Sure Start Secure Boot Keys Protection” option. Be sure to use the enter key to select the option, as the “normal” way of using the spacebar doesn’t work to select options in the HP BIOS setup.
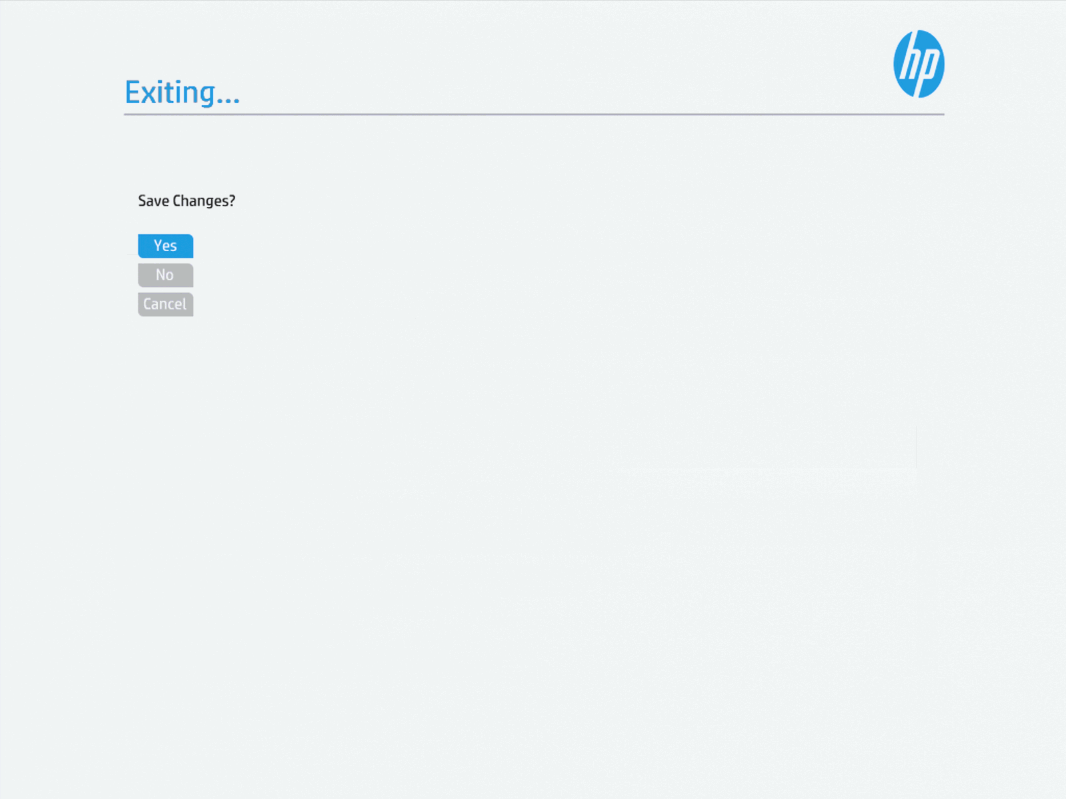
We’ll need to save this change and restart the machine. Hit escape twice (to leave the submenus) and be sure to select “Yes” to saving the changes.
When the system restarts, the Sure Start Secure Boot Keys Protection configuration will prompt us to enter a PIN to disable the protection. This is a security feature that prevents someone/something from remotely changing the SecureBoot configuration without us knowing, and requires physical access to the machine.
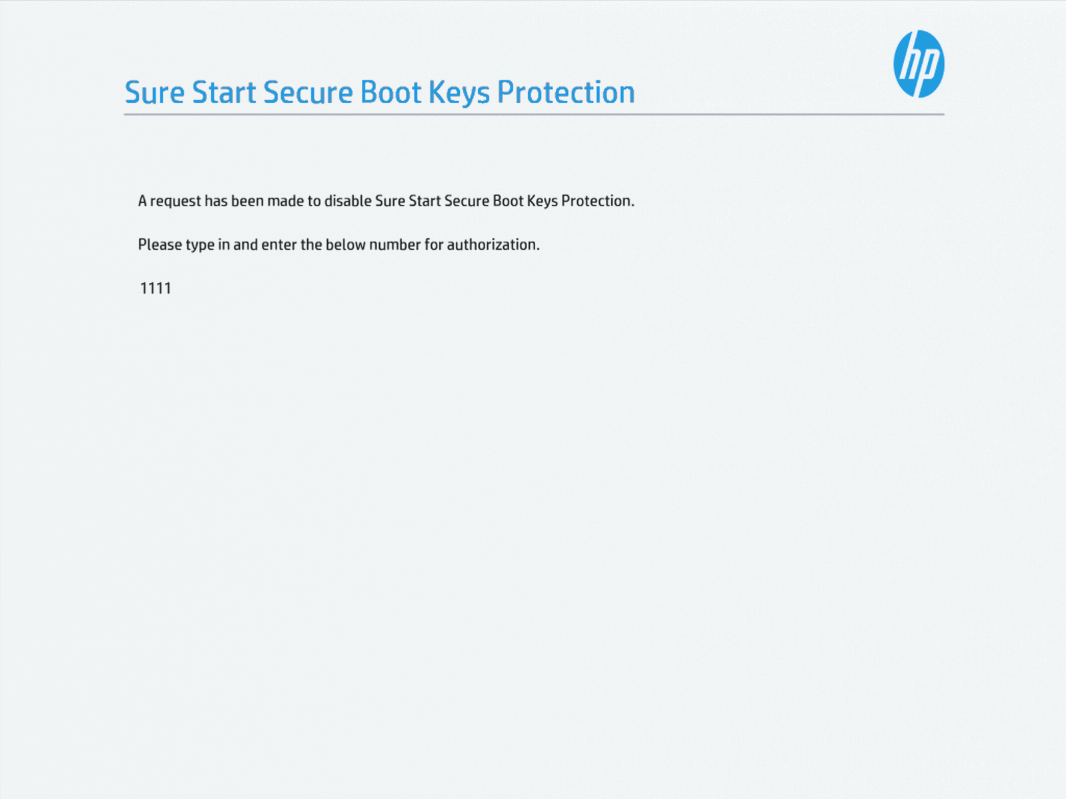
Enter the PIN shown on the screen (with your number row on the keyboard3) and hit enter.
After entering the PIN, you can start spamming the escape key to get back to the menu to select the BIOS Setup option.
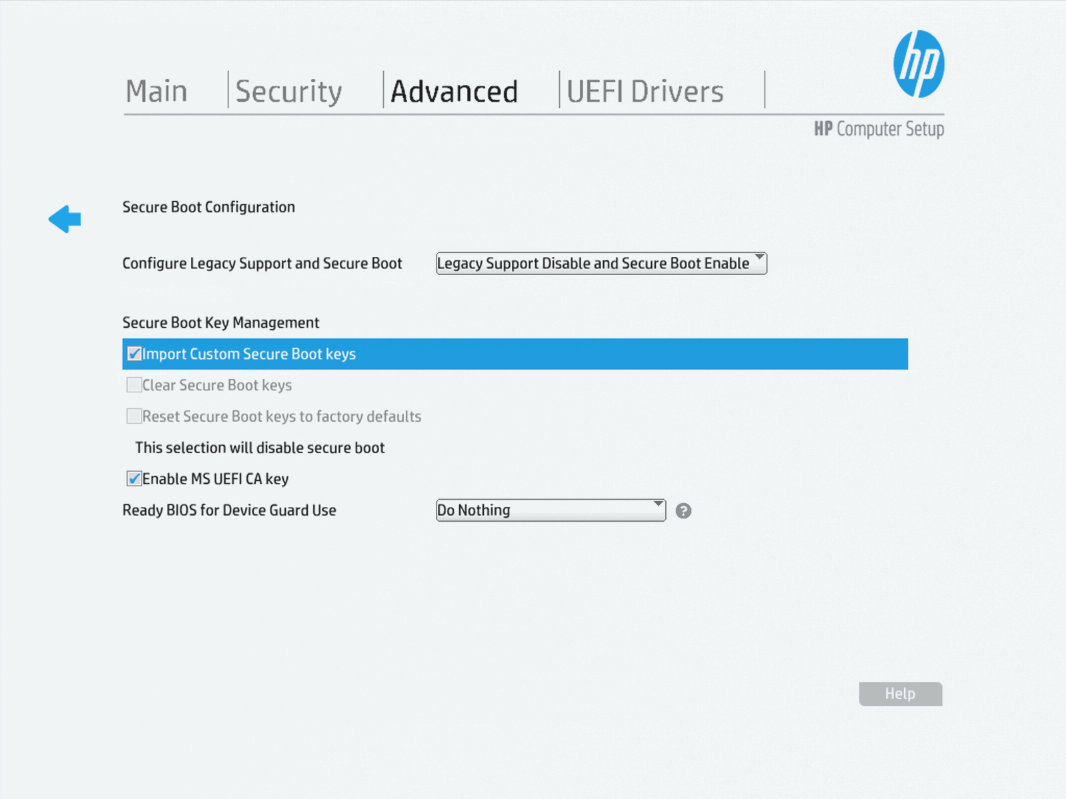
Import Custom Secure Boot Keys option 🔗
Now we can head to the “Advanced” tab at the top, and select the “Secure Boot Configuration” option. Here, we’ll want to check the box to “Import Custom Secure Boot Keys”, and then hit escape twice to save and exit again.
We now will get another prompt to enter a PIN. Enter the PIN shown on the screen again, and hit enter.
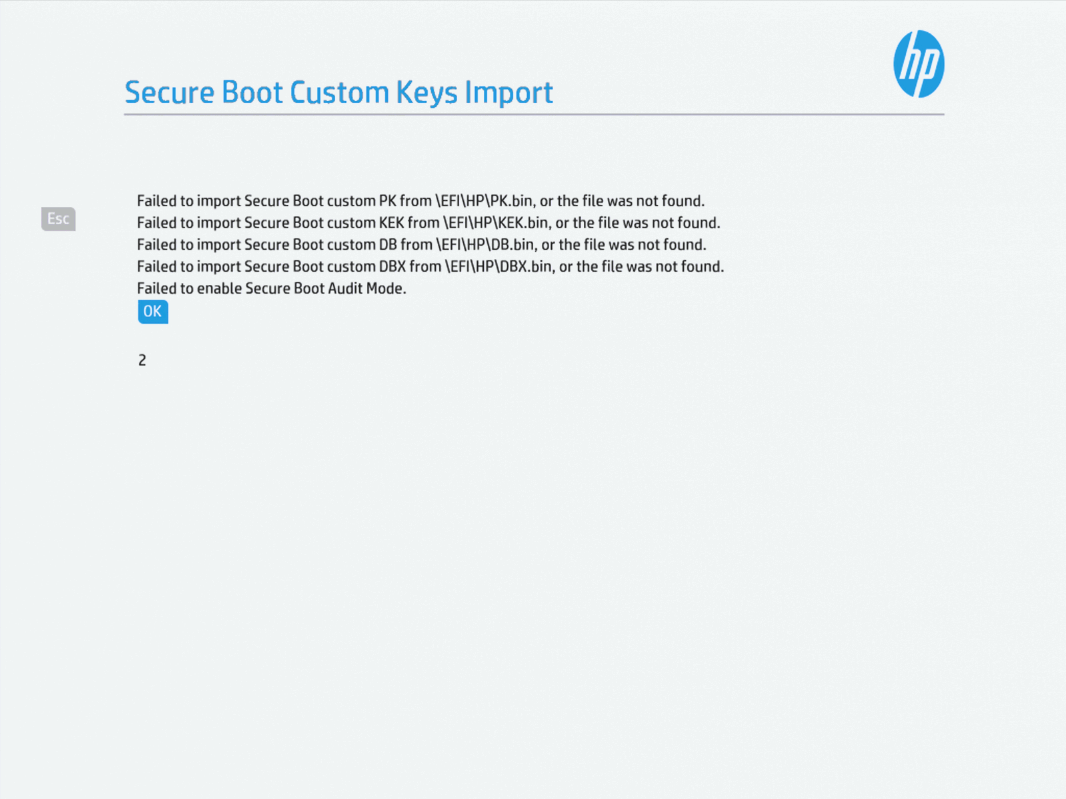
After this restart, I get a message about the Secure Boot keys failing to import, but this should be fine because we aren’t trying to import keys from a USB drive or from the \EFI\HP\ path the error message mentions. You can either wait for the timeout, or hit enter to continue booting.
After this reboot, we’ll once again receive a PIN prompt. Enter the PIN, and hit enter.
We now should automatically boot from the Talos OS ISO. If you don’t go to the Talos OS ISO at this step, you can manually select it as the boot device by hitting escape to get to the menu and select the “Boot Menu” option, then choosing your device with the ISO on it.
If you see the initial Talos OS boot menu, we’ve done it!
Talos OS Secure Boot Enrollment 🔗

We’ll want to select the “Enroll Secure Boot keys: auto” option, and then hit enter.
We’ll get a disclaimer about the risk of soft bricking the machine, but if you’re confident in the change that’ll be made, you can let the timer hit 0 and let the keys be installed.

After the keys are installed, you’ll get a message saying that the keys have been enrolled, and that the system will now restart.
Now, we’re in the home stretch. The system will boot back up to the Talos OS ISO, and we should see in the top banner that we have SECUREBOOT showing “True”!

You should now be able to install Talos OS. Refer to the Talos OS documentation for more information on how to do this.
Re-securing the BIOS options 🔗
Now that we have Talos OS installed and running, we’ll want to re-secure the BIOS options to re-secure the machine. Restart one more time, and spam the escape key to get to the BIOS setup screen.
Once we’re in the BIOS setup screen, we should navigate back to the Security tab at the top, and the select the “BIOS Sure Start” option. Once we’re in the BIOS Sure Start screen, we can check the “Sure Start Secure Boot Keys Protection” option. We can then hit escape twice to save and exit again.

Now, we’re back to the same state (security-wise at least) as before we started the SecureBoot process. We have a machine running Talos OS that is protected by SecureBoot!
The result 🔗
We now have a machine running Talos OS that is protected by SecureBoot! We also have a machine that will require lots of physical access to change the SecureBoot configuration again, and should give some peace of mind.
The future 🔗
I’ll hopefully write more about the rest of my new homelab setup soon, but for now, I’m happy to have a cluster of Talos OS nodes that are protected by SecureBoot!


